Hey Everyone!
I am sorry that I have not been posting much lately. I am so happy to say that I am finally finished the wedding invitations that I made for a co-worker. Between the Save the Dates and Wedding Invitations, I have been totally swamped. I had to make 50+ of each and did not have a lot of time to do them all. I must say that I am pleased with how they turned out. Check back in a few days to see the final results as well as a giveaway to celebrate completion! I am so happy to be done....LOL!
Anyway, welcome back to another week of CTO Challenge #15 - Create a project with a Retirement theme. I decided to dust off the Imagine and put it to work. I made 3 different cards for my retirement card set, although they could be used for several other occasions. I must say that I liked how these cards turned out and I feel motivated to try to use my Imagine more. :)
I used Enjoy the Seasons cart (which I just won on the Circle blog). This cart has some really cute images on it which do not just limit you to the seasons of the year. I cut all the images at 5". Used my cuttlebug, stickles, bling and white gel pen to add some details to the cards.
Hope you enjoy! Comments are much appreciated!
Nicole T.
Showing posts with label Vintage Distressed Ink. Show all posts
Tuesday, May 24, 2011
Sunday, February 27, 2011
Birthday Card - Brother
Hi Everyone,
Sorry it has been a while since I posted. I was extremely sick this past week. Won't bore you with the details but suffice it to say, I am so happy to be feeling better. Today is the first day that I have gone in my craft room to create. One of the items that I made is this card for my brother's birthday. Salsa dancing is one his favorite things to do in his free time. So I thought this card would be nice for him.
I am also entering this card into:
Celebrate The Occasion - Anything Goes Birthday
Fantabulous Cricut - Emboss It
Monday, February 7, 2011
MPS Challenge - 02/09/11
Hey Everyone,
I created this card and decided to enter it into the MPS challenge today. The challenge is to create a card that is Springy, Valentinesy or that just makes you happy! This card makes me very happy. I am very pleased with how it turned out. I only used my cricut for one cut, the flowers on the back. I used my Stampin Up stamps on the inside, lots of distressing around the edges with my Tim Holtz ink.
I created this trifold card and used a little key brad to keep it closed. There is lots of layering, textures, etc. on this card and I am pleased with how it turned out. I finally used my SU Wonder Crayons that I have had for many months now. I like how the shading turnded out with the colors on the flowers. I blinged it up the flowers a little more with my favorite, yes.... Diamond Stickles! :) Can never use them enough!
Anyway, thanks for dropping by and let me know what you think.....
Nicole

Details:
PTI - Rustic Cream & Kraft cardstock
Recollections - Cream Cardstock
DCWV - Linen Closet cardstack
TH Vintage Distressed Ink
Mother's Day Bouquet - Cricut Cart (flowers cut at 3.75 & 3.5)
Cuttlebug - d'Vine Swirl/Textile Textures
SU Curly Label Punch
SU Elements of Style Stamp Set
Hero Arts Birthday Sentiments
Paper Studio Diamond Bling
Diamond Stickles
Misc. Brads
I created this card and decided to enter it into the MPS challenge today. The challenge is to create a card that is Springy, Valentinesy or that just makes you happy! This card makes me very happy. I am very pleased with how it turned out. I only used my cricut for one cut, the flowers on the back. I used my Stampin Up stamps on the inside, lots of distressing around the edges with my Tim Holtz ink.
I created this trifold card and used a little key brad to keep it closed. There is lots of layering, textures, etc. on this card and I am pleased with how it turned out. I finally used my SU Wonder Crayons that I have had for many months now. I like how the shading turnded out with the colors on the flowers. I blinged it up the flowers a little more with my favorite, yes.... Diamond Stickles! :) Can never use them enough!
Anyway, thanks for dropping by and let me know what you think.....
Nicole

Details:
PTI - Rustic Cream & Kraft cardstock
Recollections - Cream Cardstock
DCWV - Linen Closet cardstack
TH Vintage Distressed Ink
Mother's Day Bouquet - Cricut Cart (flowers cut at 3.75 & 3.5)
Cuttlebug - d'Vine Swirl/Textile Textures
SU Curly Label Punch
SU Elements of Style Stamp Set
Hero Arts Birthday Sentiments
Paper Studio Diamond Bling
Diamond Stickles
Misc. Brads
Tuesday, February 1, 2011
Celebrate The Occasion - Birthday Post
Hi Everyone,
I am excited to let you all know that I have been invited to be a member of the Celebrate The Occasion design team. This is my first design team and I feel super honored that they asked me to be a part of it. Make sure you check out this blog, it is a group of super awesome ladies and it's a Challenge Blog all about celebrating the many special occasions of life that fall throughout the year. :) So make sure you join us and tell all your other crafty friends about us!
So for our first post, we are to create a project with a birthday theme. I decided I wanted to do a card with a butterfly as the focal point of it. I Love Hearts and Butterflies... :) Anyway, I chose to use the first butterfly on the Rock Princess cart. It ended up having seven layers all together and I really like the way it turned out. I tried to go outside of my normal self and use lots of bright colors!
So, here are the details. It is a 5x7 card. I used the Happy Birthday cuttlebug embossing folder and inked it up with Vintage Distressed Ink, distressed some of the edges with the Tim Holtz distresser, blinged it up a little bit with Paper Studio gemstones. I hope you guys like it. Leave me a comment and let me know what you think. Thank you...
Nicole
Details:
Stampin' Up Paper - Crushed Curry, Bermuda Bay
Papertrey Ink. - Lemon Tart, Rasberry Fizz, Ripe Avocado
Rock Princess Cricut Cart - Butterfly w/layers cut at 2.75" plus shadow base layer
Happy Birthday Embossing Folder
Tim Holtz Vintage Distressed Ink
Tim Holtz Distresser
Paper Studio Diamond Gemstones
Stampin' Up Designer Buttons (Bright)
Papertrey Ink Twine - Rustic Cream
Stampin Up Sentiment - So Happy For You (2011 Sale-A-Bration)
Butterfly Stamp Inside Card - Hero Arts
Stampin Up Ink - Classic Brown
Also don't forget, I am now a Stampin Up Demonstrator and can fulfill your SU orders, so please feel free to contact me if you have any questions, need a catalog, etc...
I am excited to let you all know that I have been invited to be a member of the Celebrate The Occasion design team. This is my first design team and I feel super honored that they asked me to be a part of it. Make sure you check out this blog, it is a group of super awesome ladies and it's a Challenge Blog all about celebrating the many special occasions of life that fall throughout the year. :) So make sure you join us and tell all your other crafty friends about us!
So for our first post, we are to create a project with a birthday theme. I decided I wanted to do a card with a butterfly as the focal point of it. I Love Hearts and Butterflies... :) Anyway, I chose to use the first butterfly on the Rock Princess cart. It ended up having seven layers all together and I really like the way it turned out. I tried to go outside of my normal self and use lots of bright colors!
So, here are the details. It is a 5x7 card. I used the Happy Birthday cuttlebug embossing folder and inked it up with Vintage Distressed Ink, distressed some of the edges with the Tim Holtz distresser, blinged it up a little bit with Paper Studio gemstones. I hope you guys like it. Leave me a comment and let me know what you think. Thank you...
Nicole
Details:
Stampin' Up Paper - Crushed Curry, Bermuda Bay
Papertrey Ink. - Lemon Tart, Rasberry Fizz, Ripe Avocado
Rock Princess Cricut Cart - Butterfly w/layers cut at 2.75" plus shadow base layer
Happy Birthday Embossing Folder
Tim Holtz Vintage Distressed Ink
Tim Holtz Distresser
Paper Studio Diamond Gemstones
Stampin' Up Designer Buttons (Bright)
Papertrey Ink Twine - Rustic Cream
Stampin Up Sentiment - So Happy For You (2011 Sale-A-Bration)
Butterfly Stamp Inside Card - Hero Arts
Stampin Up Ink - Classic Brown
Also don't forget, I am now a Stampin Up Demonstrator and can fulfill your SU orders, so please feel free to contact me if you have any questions, need a catalog, etc...
Monday, December 13, 2010
Wacky Wednesday Challenge #18 Pet Challenge
Hey Everyone,
Here is a card that I created for Wacky Wednesday Challenge #18 - Pet theme. I really like how it came out. The ribbon portion was inspired by Scrappin' Navy Wife. She made a card last week with this ribbon/bow style and I really liked it so I thought I would try it.
Details:
Birthday Bash Cart - dog 3.5"
Cuttlebug Snowflakes
PTI Cardstock - White, Pure Poppy, Kraft
PTI Ribbon & Button
$1 Stamp from Michaels
Stickles
Recollections Bling
Vintage Distressed Ink
Here is a card that I created for Wacky Wednesday Challenge #18 - Pet theme. I really like how it came out. The ribbon portion was inspired by Scrappin' Navy Wife. She made a card last week with this ribbon/bow style and I really liked it so I thought I would try it.
Details:
Birthday Bash Cart - dog 3.5"
Cuttlebug Snowflakes
PTI Cardstock - White, Pure Poppy, Kraft
PTI Ribbon & Button
$1 Stamp from Michaels
Stickles
Recollections Bling
Vintage Distressed Ink
Friday, December 3, 2010
Bell Ornament Challenge @ FlowerDisco's blog
Hey Everyone,
Sorry I have not posted lately. I just got a new job and it is taking me a minute to adjust to working all day and then caring for my daughter when we get home in the evening. I have been working on some projects but have not completely finished or photographed the project to post, etc.
Anywho...Agnes over at FlowerDisco made this beautiful bell ornament and wanted her fellow bloggers to make our version of the ornament. It is on the Christmas Noel cartridge that was part of the free Gypsy cart download.
Anyway, here is my version. No where near as nice as Agnes' but I tried... :) I made a card with the ornament on the front. Let me know what you think and when you get a chance, definitely check out Agnes' blog if you haven't already. She does amazing work and you definitely will be inspired!
Details:
PTI Fine Linen Cardstock 5"x5" Card
Recollection Spice Cardstock
Christmas Noel Cart 3.5"
Recollection Designer Brads
MME Wonderful Winter Glittered Christmas Papers
PTI Ribbon
Vintage Distressed Ink
Pearl Glimmer Mist
Thanks....
Nicole
Sorry I have not posted lately. I just got a new job and it is taking me a minute to adjust to working all day and then caring for my daughter when we get home in the evening. I have been working on some projects but have not completely finished or photographed the project to post, etc.
Anywho...Agnes over at FlowerDisco made this beautiful bell ornament and wanted her fellow bloggers to make our version of the ornament. It is on the Christmas Noel cartridge that was part of the free Gypsy cart download.
Anyway, here is my version. No where near as nice as Agnes' but I tried... :) I made a card with the ornament on the front. Let me know what you think and when you get a chance, definitely check out Agnes' blog if you haven't already. She does amazing work and you definitely will be inspired!
Details:
PTI Fine Linen Cardstock 5"x5" Card
Recollection Spice Cardstock
Christmas Noel Cart 3.5"
Recollection Designer Brads
MME Wonderful Winter Glittered Christmas Papers
PTI Ribbon
Vintage Distressed Ink
Pearl Glimmer Mist
Thanks....
Nicole
Labels:
Christmas,
Christmas Noel,
Vintage Distressed Ink
Friday, November 19, 2010
My Pink Imagine-Nation Challenge
Hey Everyone,
Just wanted to share a project I created for Robyn's My Pink Imagine Nation Wednesday Challenge.
I used my Imagine only for this project. I used the patterned paper from Imagine More along with Holiday Cakes. I have been trying to work on some Christmas/Holiday cards and decided to do something along those lines. I had been thinking about using the mittens on Joys of the Season but just got this Holiday Cakes cart and liked the ones on there better. I also got the sentiment from Holiday Cakes.
Let me know what you think.....
Just wanted to share a project I created for Robyn's My Pink Imagine Nation Wednesday Challenge.
I used my Imagine only for this project. I used the patterned paper from Imagine More along with Holiday Cakes. I have been trying to work on some Christmas/Holiday cards and decided to do something along those lines. I had been thinking about using the mittens on Joys of the Season but just got this Holiday Cakes cart and liked the ones on there better. I also got the sentiment from Holiday Cakes.
Let me know what you think.....
PTI Cardstock - Spring Rain 5.5x5.5
Patterned Paper - Imagine More design printed on Bazzill white cardstock
Imagine More cart
Holiday Cake cart
Mittens cut @ 3.5 rel size
Rectangle from Imagine cut @ 4.7 & 4.5"
MS Punch
Stickles
Nicole
Sunday, November 14, 2010
Par-fect Birthday Card
Good Morning Everyone,
I wanted to share a quick card that I made for my uncle. He loves to golf so I wanted to make a birthday card using a golf theme. I used Everyday Paperdolls for the man and the golf bag. The Golf cart is from Jolee's by You Dimensional Sticker (which I must say was falling apart when I went to use it). This is the first time I have used a sticker on a card but I think it added something to the card. I printed the sentiment on my computer.
Deets:
PTI Cardstock - Rustic Cream & Kraft
Patterned paper - SEI Madeline
Cardsize - 5x7
Everyday Paper Dolls cart
Vintage Distressed Ink
Golf Cart - Jolee's by You Dimensional Sticker
EK Success Punch
Recollections Black Bling
Your comments are so appreciated! Thx...
Nicole
Tuesday, November 9, 2010
Emma's Imagine-Nation Challenge
Hi Everyone,
Haven't posted anything for several days but I have been working on some Christmas card ideas. I will be posting them in the next couple days. Anyway, tonight I decided to participate in Emma's Imagine-Nation Mondays. This week's theme is buttons. I have always wanted to use buttons and just received my order of buttons from PTI last week, so I am pretty psyched to try it out. Next, I have to find my sewing machine that my mom gave me several years ago (it's still in the box) so that I can start to sew on my cards. I really like that effect on cards and I am hopeful that I can develop that sewing skill... Anyway, here is the card (not sure if I adhered the buttons correctly but they are staying so far):
Deets:
Imagine More cart
Walk In My Garden cart - flower pot border, flowers & stem cut @ 2"
Cardstock: PTI Rustic Cream (5x7 card)
Patterned Cardstock: magine More design printed on 12x12 Bazzill cardstock
Buttons: PTI Vintage Holiday Mix
Vintage Distressed Ink
Stampin Up Noteworthy Stamps
Diamond Stickles (of course)
Thanks for looking and let me know your thoughts/suggestions! :)
Nicole
Haven't posted anything for several days but I have been working on some Christmas card ideas. I will be posting them in the next couple days. Anyway, tonight I decided to participate in Emma's Imagine-Nation Mondays. This week's theme is buttons. I have always wanted to use buttons and just received my order of buttons from PTI last week, so I am pretty psyched to try it out. Next, I have to find my sewing machine that my mom gave me several years ago (it's still in the box) so that I can start to sew on my cards. I really like that effect on cards and I am hopeful that I can develop that sewing skill... Anyway, here is the card (not sure if I adhered the buttons correctly but they are staying so far):
Deets:
Imagine More cart
Walk In My Garden cart - flower pot border, flowers & stem cut @ 2"
Cardstock: PTI Rustic Cream (5x7 card)
Patterned Cardstock: magine More design printed on 12x12 Bazzill cardstock
Buttons: PTI Vintage Holiday Mix
Vintage Distressed Ink
Stampin Up Noteworthy Stamps
Diamond Stickles (of course)
Thanks for looking and let me know your thoughts/suggestions! :)
Nicole
Monday, November 1, 2010
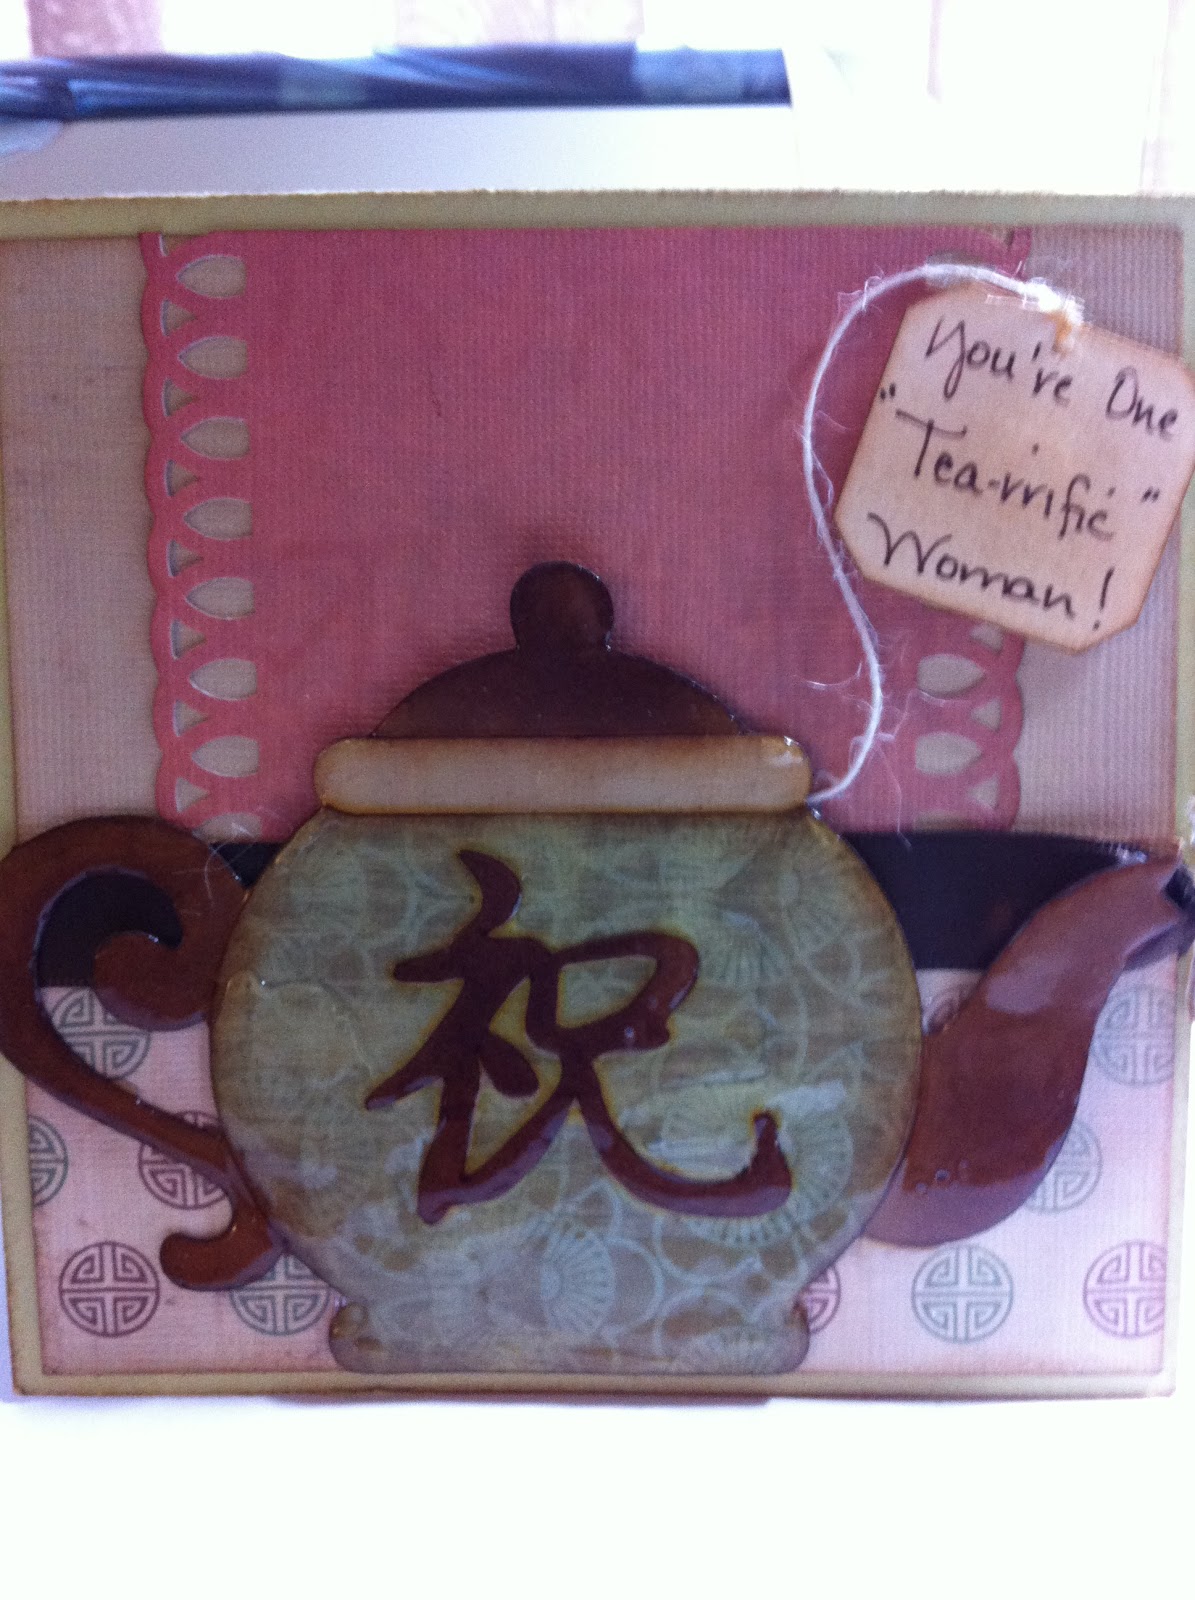
Tea Pot Card
Hi,
I made this birthday card for my cousin who loves tea.
Martha Stewart Punch
Vintage Distressed Ink
Glossy Accents
Misc. Ribbon & Hemp
I hope you like it!
Nicole
I made this birthday card for my cousin who loves tea.
Deets:
PTI Cardstock
DCWV Far East Cardstack
Pagoda CartridgeMartha Stewart Punch
Vintage Distressed Ink
Glossy Accents
Misc. Ribbon & Hemp
I hope you like it!
Nicole
Labels:
Birthday,
Glossy Accents,
Pagoda,
Vintage Distressed Ink
Saturday, October 30, 2010
Cricut Circle Monthly Challenge
Hello Fellow Crafters!
Haven't been feeling well, so I have not been posting these past couple days. I have worked on a few cards but have not put all the finishing touches on them, but I will post them as soon as I am back up and running.
However, had to post this one today as it is for the Cricut Circle Monthly Challenge and it is due today...nothing like waiting until the last minute.
The theme was:
OCTOBER MONTHLY CHALLENGE: CELEBRATING CREATIVITY
The theme for this month’s challenge is all about celebrating the reasons why you love to create! Please create a scrapbook page or home decor project CELEBRATING CREATIVITY. Project must be newly created for this challenge and should include atleast 2 cuts to qualify. You must also:
So my thought behind my layout was my daughter, who was/is the motivation for me to be creative so that I can capture the memories of her childhood for her to have when she is older. She is the reason that I Create!
Details:
Dark/Light Purple Cardstock - Bazzill
Pink Patterned Paper - DCWV Mariposa Stack (my Favorite)
*Light Purple/Pink Patterned Paper cut using Imagine Best Friends cart using the Cut Only feature
imagine - Home Accents cart, Paper Studio purple cardstock cut at 4"
create - Gypsy Font cart, K&Co Jubilee Purple Burst cardstock, shadow Recollections cardstock cut at 2.75"
Tag - Tags, Bags & More, Recollections cardstock cut at 4.29" Words (Tim Holtz) printed on computer
Large Butterfly - Once Upon A Princess Cart - cut at 3.25, Purple Bazzill Cardstock, Mariposa Photo Mat Stack
Small Butterflies - Imagine Nursery Tails cart
Flower - Forever Young Cart - cut at 2.5", 2", 1.5", 1.25" with Diamond Dust
LOVE/Heart - Tim Holtz grunge board letter, gold powder embossing powder
Photo Mats - Pink Paper printed & cut using Imagine Nursery Tail, Tan - Recollections Cardstock
Vintage & Dusty Concord Distressed Ink
Miscellaneous Purple Floss Ribbon
Stickles - Diamond, Eucalyptus & Cotton Candy
Ink Essentials Opaque Pen
iRock Bling
Haven't been feeling well, so I have not been posting these past couple days. I have worked on a few cards but have not put all the finishing touches on them, but I will post them as soon as I am back up and running.
However, had to post this one today as it is for the Cricut Circle Monthly Challenge and it is due today...nothing like waiting until the last minute.
The theme was:
OCTOBER MONTHLY CHALLENGE: CELEBRATING CREATIVITY
The theme for this month’s challenge is all about celebrating the reasons why you love to create! Please create a scrapbook page or home decor project CELEBRATING CREATIVITY. Project must be newly created for this challenge and should include atleast 2 cuts to qualify. You must also:
- Use the Shadow Feature
- Use Patterned Paper (purchased, printed, or created with stamps, etc.)
- Use Embellishments to Enhance One of the Cuts (pearls, buttons, gems, glitter, etc.)
So my thought behind my layout was my daughter, who was/is the motivation for me to be creative so that I can capture the memories of her childhood for her to have when she is older. She is the reason that I Create!
![]() |
I never Imagined I could Create something that would fill me with so much LOVE! |
Details:
Dark/Light Purple Cardstock - Bazzill
Pink Patterned Paper - DCWV Mariposa Stack (my Favorite)
*Light Purple/Pink Patterned Paper cut using Imagine Best Friends cart using the Cut Only feature
imagine - Home Accents cart, Paper Studio purple cardstock cut at 4"
create - Gypsy Font cart, K&Co Jubilee Purple Burst cardstock, shadow Recollections cardstock cut at 2.75"
Tag - Tags, Bags & More, Recollections cardstock cut at 4.29" Words (Tim Holtz) printed on computer
Large Butterfly - Once Upon A Princess Cart - cut at 3.25, Purple Bazzill Cardstock, Mariposa Photo Mat Stack
Small Butterflies - Imagine Nursery Tails cart
Flower - Forever Young Cart - cut at 2.5", 2", 1.5", 1.25" with Diamond Dust
LOVE/Heart - Tim Holtz grunge board letter, gold powder embossing powder
Photo Mats - Pink Paper printed & cut using Imagine Nursery Tail, Tan - Recollections Cardstock
Vintage & Dusty Concord Distressed Ink
Miscellaneous Purple Floss Ribbon
Stickles - Diamond, Eucalyptus & Cotton Candy
Ink Essentials Opaque Pen
iRock Bling
Tuesday, October 26, 2010
Imagine Nation Monday Polka Dot Challenge
Hi Everyone,
I am playing along with Emma's Imagine Nation Monday over at My Creative Time. The challenge is to use your Imagine and create something with polka dots. I decided to stretch my "creativity" by using multi patterns. I am a monotone kinda gal (beige, black, cream...neutral colors & def no patterns) when it comes to clothing, bags, shoes, etc. Crafting has really caused me to dig deep in creatively using color, color combinations and patterns. This card definitely has plenty of color and pattern!
Deets:
Cardstock - PTI
Pattern Paper - Imagine Best Friends
All Images - Imagine Best Friends
EK Success Punch
White Gel Pen
iRock Bling
Paper Studio Bling
Diamond Stickles (of course)
Vintage Distress Ink
Let me know what you think!
Nicole
I am playing along with Emma's Imagine Nation Monday over at My Creative Time. The challenge is to use your Imagine and create something with polka dots. I decided to stretch my "creativity" by using multi patterns. I am a monotone kinda gal (beige, black, cream...neutral colors & def no patterns) when it comes to clothing, bags, shoes, etc. Crafting has really caused me to dig deep in creatively using color, color combinations and patterns. This card definitely has plenty of color and pattern!
Deets:
Cardstock - PTI
Pattern Paper - Imagine Best Friends
All Images - Imagine Best Friends
EK Success Punch
White Gel Pen
iRock Bling
Paper Studio Bling
Diamond Stickles (of course)
Vintage Distress Ink
Let me know what you think!
Nicole
Wednesday, September 29, 2010
Imagine That Wednesday @ MPS
Hi All,
Today, Robyn over at MPS posted her Awesome Imagine That project.
She has invited everyone to post their Imagine project, so here is mine..... Not too excited about how it came out, plus I kinda messed it up at the end but I am going to post it anyway.
While I really like it and I have been one of the fortunate ones who have not had any technical difficulties with it, I am not sure I like they way it cuts/prints the layers. I don't like the border around the images and I wish there were more options. I guess I just prefer the way the individual cuts look on the Expression so far. However, I do like how you can see what your project is going to look like and the color combo options. We shall see, I am going to keep playing with it and see what I can come up with.
Anywhooo....here it is.
Today, Robyn over at MPS posted her Awesome Imagine That project.
She has invited everyone to post their Imagine project, so here is mine..... Not too excited about how it came out, plus I kinda messed it up at the end but I am going to post it anyway.
While I really like it and I have been one of the fortunate ones who have not had any technical difficulties with it, I am not sure I like they way it cuts/prints the layers. I don't like the border around the images and I wish there were more options. I guess I just prefer the way the individual cuts look on the Expression so far. However, I do like how you can see what your project is going to look like and the color combo options. We shall see, I am going to keep playing with it and see what I can come up with.
Anywhooo....here it is.
Thanks for looking.....
Nicole
Thursday, September 23, 2010
MPS 5 Million Celebration Post #2 - Challenge
Hi Everyone,
So here is my submission for My Pink Stamper 5 Million Celebration Post #2 - Challenge. I had to participate, as Robyn has been a huge part of my journey through this creative process. I have been inspired and learned so much about my Cricut from her blog and tutorials. I am truly Thankful for her hard work in inspiring/teaching us all through her blog.
I again used the Cricut Imagine. I am trying to play with as much as possible to make sure there are no issues with it. I have to say, so far I must be one of the lucky ones who got one without any problems. Although, my cut is slightly off but I will re-calibrate it and see what happens.
Anyway, here goes. I used the Imagine More cart and MPS Punnylicious stamps for this project. EK Success punch and Vintage Distressed Ink. Papertrey Ink cardstock.
So here is my submission for My Pink Stamper 5 Million Celebration Post #2 - Challenge. I had to participate, as Robyn has been a huge part of my journey through this creative process. I have been inspired and learned so much about my Cricut from her blog and tutorials. I am truly Thankful for her hard work in inspiring/teaching us all through her blog.
I again used the Cricut Imagine. I am trying to play with as much as possible to make sure there are no issues with it. I have to say, so far I must be one of the lucky ones who got one without any problems. Although, my cut is slightly off but I will re-calibrate it and see what happens.
Anyway, here goes. I used the Imagine More cart and MPS Punnylicious stamps for this project. EK Success punch and Vintage Distressed Ink. Papertrey Ink cardstock.
Thanks for checking out my work.
Nicole
Subscribe to:
Posts (Atom)